Tailwind CSS 大全
框架介紹
Component UI
Bootstrap 是 Component UI 型的 CSS Framework,使用過 Bootstrap 都知道它擁有強大的網格系統與 Components UI 提供設計者使用,另外也有貼心的 Utility 工具調整內容、寬度、距離等等,但在操作切版的自由靈活度上稍嫌不足,多組件設計的方便性讓製作出的版型常常長得很像,不過,它之所以成為全球著名的 CSS Framework 之一,設計的核心就是希望被普遍大眾接受且容易使用,它確實做到了,使用組件來設計 RWD 版型,Bootstrap 非常快速。
Utility UI
Tailwind CSS 屬於實用工具類型(Utility)的 CSS 框架,與 Bootstrap 最大的不同點在於 Tailwind CSS 全力支持使用工具類型的 Class 讓設計者完成客製化的版型,甚至可以不用寫 CSS 或鮮少就能完成版型設計,它可在 HTML 文件的元素內靈活操作 Class,也因為這特性,必須使用 Class 去組合各種 CSS 的觀念技巧,類似一種組合技的概念,所以客製化切版速度非常快,但比起 Bootstrap,它更考驗了設計者對於 CSS 的了解以及 Tailwind CSS 的環境設定,可能比較不適合新手。
核心設計理念
實用工具優先
在傳統設計上,您要為一個區塊去制定屬於它的樣式,因此整個區塊會是這樣定義,例如要設計一個 card,會將 card 拆成幾個部分來放置內容。屬於 UI Component 的設計理念。
/* card 樣式 */ |
使用 Tailwind CSS,全部使用 Utility Class 來完成,您看不到任何 class 彼此有關係,而且能完成區塊設計,這就是直覺式 Utility 設計理念。
<div class="max-w-sm mx-auto flex p-6 bg-white rounded-lg shadow-xl"> |
會發現這不就是在寫 class 級的行內樣式嗎?真是又臭又髒的結構,沒錯,確實如此,這是因為我們在網頁學習進程裡,學到的是結構、樣式、行為應該要分離,要使用這種方式太可怕了!官網也承認,您是對的喔!

想想,前端似乎來到了顛覆的時代,在 vue.js 也可以發現為了資料驅動畫面,把邏輯、程式述句寫在元素結構裡面,或許是前端的複雜性開始衍生出人類偏愛直覺簡單的邏輯,一潮之後又一潮的循環,因此框架設計的思維也開始轉變。話說回來,雖然 Utility Class 讓結構變長了,換個觀點,您從此不用再浪費時間去為組件想一個 class 名稱,可以很直覺的以 CSS 知識來設計樣式(您得先習慣 Tailwind),所有的 CSS 相關樣式都已經被建置成 Utility 化,盡可能不需要編寫新的 CSS。使用 Tailwind CSS,只需要關心如何使用 Utility Class 來完成區塊設計,設計非常直覺自由,且它與行內樣式不同的是:
- 行內樣式的屬性值是死的,Tailwind 可以系統性自訂 Class,讓外觀具有一致性。
- Tailwind 可以在行內 Class 使用響應式設計。
- 行內樣式無法使用偽類 :hover 或 :focus,Tailwind CSS 可以使用。
響應式設計
您可以在 Utility Class 加入斷點(breakpoints)前綴詞而不用離開 HTML,官方說明每一個 class 都可以使用喔,並提供了四種可被自訂的響應式斷點,它們都可以在 tailwind-config.js 設定。若覺得裝置尺寸不夠或前綴詞名稱不夠潮,也可以新增來擴充專案需求。以下範例,在各尺寸會改變文字顏色,注意,它們都加上了響應式的斷點前綴詞。
<div class="text-6xl sm:text-red-500 md:text-green-500 lg:text-blue-500 xl:text-yellow-500">KaiFu</div> |
移動優先
Tailwind 具有移動優先的概念,這類似於 Bootstrap 與 Foundation 中所使用的系統。也就是您沒加斷點前綴詞,它是對所有尺寸都有效,而加上 md:text-red-500 則表示從 md 尺寸開始之後的文字顏色的改變,在此之前維持另一組樣式(若有設定沒有綴詞的 Class)。在設計時,只需考慮甚麼尺寸開始生效的觀念即可。
使用偽類
除了響應式設計,也可以在 Class 上使用狀態型偽類(hover:、focus:、active:…),來增加互動性。
<button class="bg-transparent hover:bg-blue-500 text-blue-700 hover:text-white">Hover me</button> |
添加樣式與函式功能
首先,您應該使用現有 Tailwind Utility Class 來設計版型,而不是編寫新的 CSS,但如果要將某些基本樣式用於特定元素,可以使用 @layer 添加,通過使用 @layer 指令,Tailwind 將自動將這些樣式移到同一位置。
@tailwind base; |
@font-face 規則
您可以使用相同的方法為@font-face 正在使用的任何自定義字體添加規則:
@tailwind base; |
@apply
提取相同重複的 Class 進行組件化,在設計的過程,元素區塊常常重複使用,例如以下的按鈕,使用 Tailwind CSS 來撰寫會需要很長的 Class,按鈕如果重複在文件出現時,會讓整份文件變得又臭又長,此時可以使用 @apply 來提取重複的部分,放在一個制定的 Class 裡面,注意的是,偽類無法直接使用,需要另外寫 .className:hover 來指定。
<style> |
也可以單行呼叫:
.btn { |
或混合呼叫:
.btn:hover { |
重構 CSS
重複性還是太多時,依舊要重構,例如以下:
@layer components { |
重構後:
@layer components { |
@layer
將制定的 Class 添加到 Tailwind 對應的區塊。Tailwind 會將這些樣式自動移到與相同的位置 @tailwind components,因此您不必擔心在源文件中正確放置順序。
@tailwind base; |
@responsive
新增自己的 class 且具有 RWD 效果。
/* input */ |
@variants
@variants 可為 Class 產生偽類。請務必注意,偽類是按照您指定的順序產生的。
/* Input */ |
產生響應式、偽類並放進 utilities 組件
@tailwind base; |
theme()
使用 theme() 函式來設定屬性值,注意,要使用點表示法訪問嵌套的顏色值。
.content-area { |
安裝與設定
使用 Node.js 環境,請先安裝 Node.js。
初始化專案
建立一個專案目錄,在此專案目錄下輸入以下指令:
npm init -y |
安裝 Tailwind CSS
在專案目錄下安裝 Tailwind CSS
npm install tailwindcss |
建立 CSS 檔案
- 在專案根目錄下建立一個目錄 src,並在 src 下建立 css 目錄。
- 在 css 目錄下,建立 tailwind.css。
- 引入 Tailwind CSS 三個組件區塊,分別是 base、components、utilities。Tailwind 主要的組件區塊。
/* 基本 HTML 樣式,包含調整過的 Normalize.css */ |
現在,可以做個測試,在根目錄下,輸入以下指令編譯出 CSS,注意路徑檔名是否正確,編譯出 Tailwind CSS 檔案有 2MB 以上,容量非常大,Bootstrap 約 10000 多行樣式碼,Tailwind 有 100000 多行樣式碼,可以說是十倍界王拳?不擔心,之後可以使用 PurgeCSS 進行瘦身。
npx tailwindcss build ./src/css/tailwind.css -o ./src/css/style.css |
建立 postcss.config.js
在專案根目錄下建立 postcss.config.js,這是編譯 tailwind.css 前的設定檔,等等需要安裝其相關套件。
// postcss.config.js |
PurgeCSS + Postcss
PurgeCSS 是將 CSS 瘦身的好物,打包時會將沒使用到的 Class 拿掉,而 Postcss 可以編譯 CSS 延伸的功能,例如自動前綴詞,安裝以下的套件:
npm install @fullhuman/postcss-purgecss --save-dev |
打開 package.json 新增指令
// 指令需對應檔案路徑位置 |
輸入以下指令編譯出瘦身過後的 CSS 檔。
npm run postcss |
重要的 tailwind.config.js
建立 tailwind.config.js
tailwind.config.js 是 Tailwind CSS 最重要的設定檔,如果要客製化自己的 Tailwind,全部在這裡設定,您也可以在 tailwind.config.js 設置 purge 瘦身,並且再進行一次 npm run tailwind 編譯,就會得到使用過的 class,前提是要先要有文件,並且該文件 link 了樣式檔使用了 Utility Class,tailwind.config.js 才會去偵測。另外,使用 VSCode 套件 Tailwind CSS IntelliSense,沒有該檔案也無法有提示的作用喔。
- 以下指令會產生全部預設的配置,它會在專案根目錄:
npx tailwindcss init --full |
- 以下指令只會產生設定檔初始架構:
npx tailwindcss init |
- 使用 tailwind.config.js 設定 purge
// tailwind.config.js |
自訂 tailwind.config.js
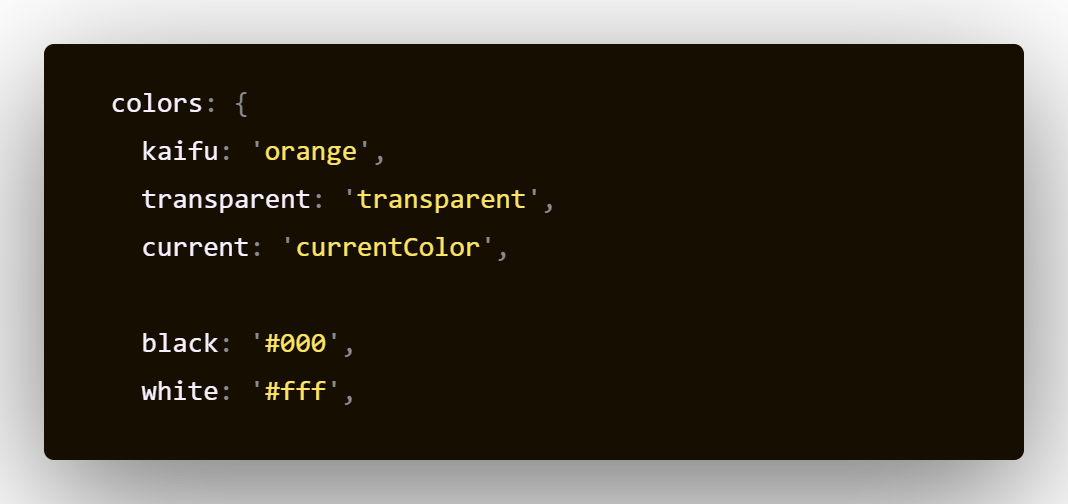
- 您可以自訂義屬於自己的 class,例如:想新增一個 kaifu class,會定義出 text-kaifu、bg-kaifu、border-kaifu 等相關的 class,可以自由修改 CSS 屬性相關的屬性值,或是修改斷點 RWD 的尺寸,tailwind.config.js 設定檔寫得很清楚。
使用流程建議
可先使用 CDN 配合官網文件熟悉 Utility Class。
<link href="https://unpkg.com/tailwindcss@^1.0/dist/tailwind.min.css" rel="stylesheet">
或
npm run tailwind自訂義生成一整包來使用,若有設定 purges,要先 enabled:false。搭配 VSCode 套件提示 class 名稱 Tailwind CSS IntelliSense,注意,必須要有 tailwind.config.js 才會有提示!
設計完成後再進行瘦身,
npm run postcss或npm run tailwind。